Overview
Sedai, an AI-powered cloud optimization software, is a powerful tool any developer can easily use. Assuming one has an AWS account (if not, see tutorial here),
Setting up the Retail Demo App
For this example, we are optimizing a sample e-commerce store that is built for an Elastic Kubernetes deployment as part of the EKS workshop. The EKS workshop is linked here and to deploy it, one simply needs to follow the steps through the Introduction to Fundamentals module.

Set up Sedai
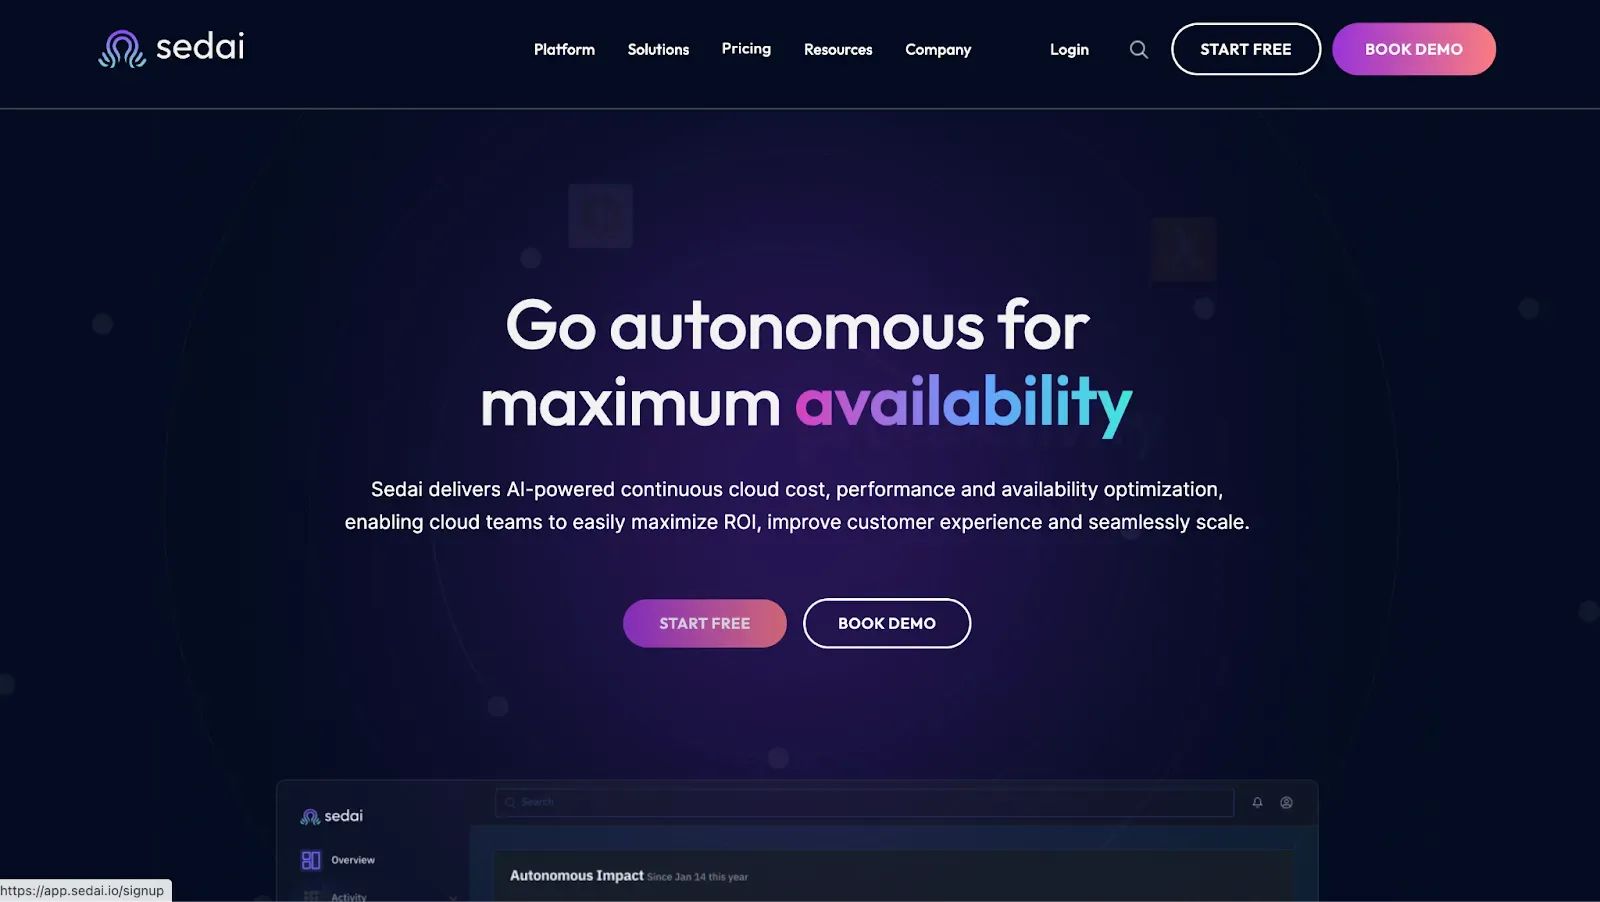
The first step is to go to the Sedai website at sedai.io and begin by clicking the Start Free button as displayed below.
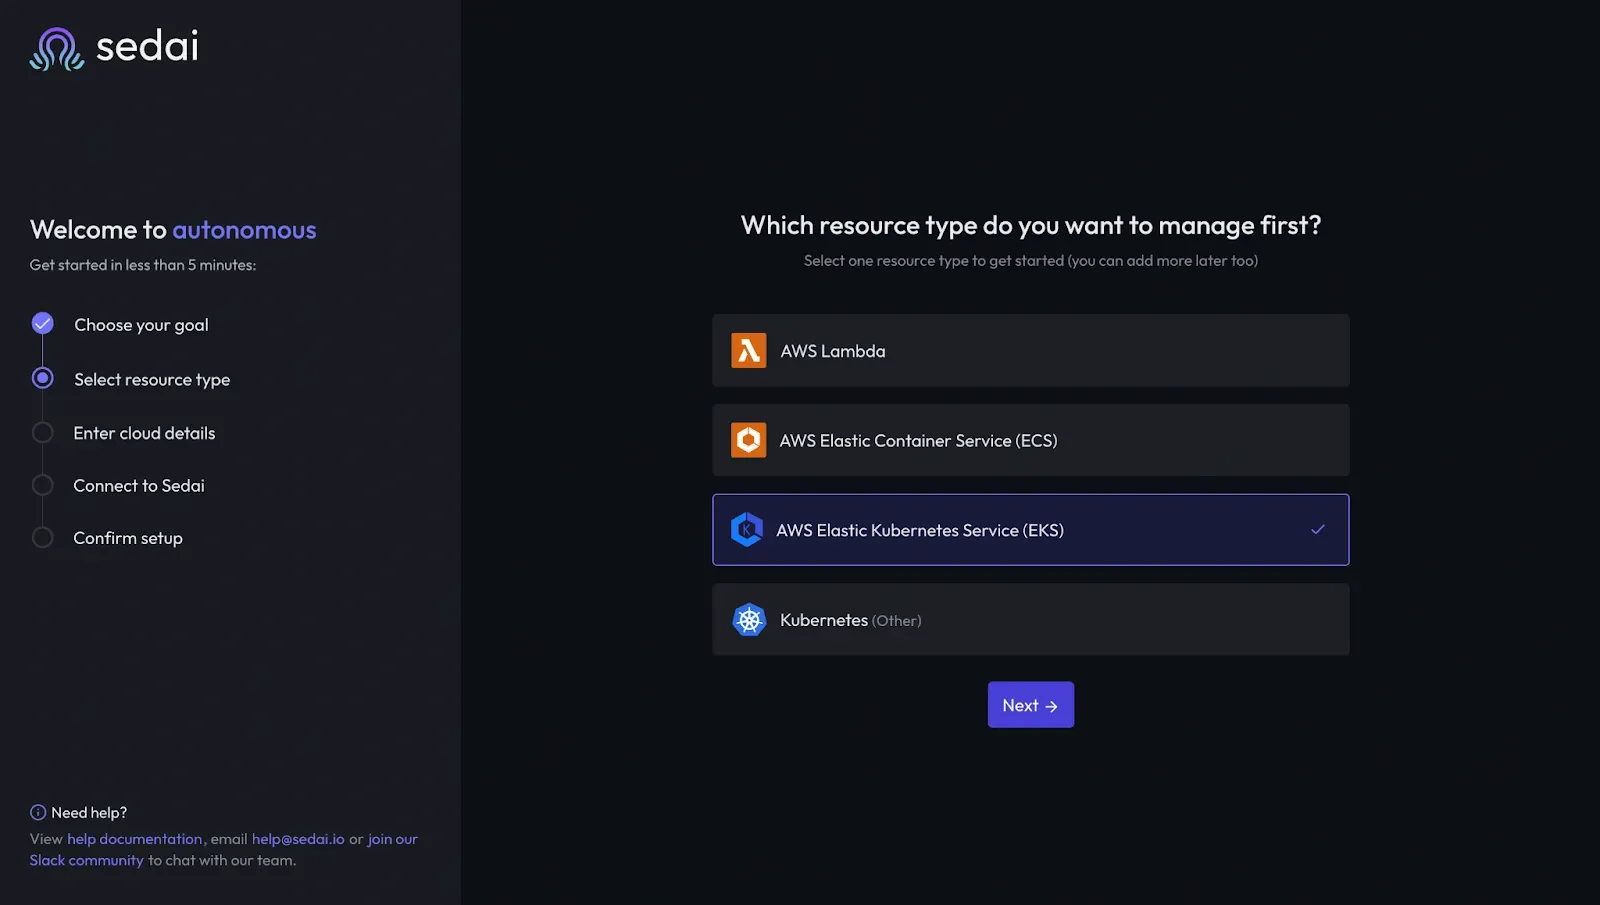
Once you click the button, you are prompted to a simple account creation page to input your basic information for a one-month free trial. After signing up, you will begin an introduction to the autonomous tools used. Here, you can easily specify your goals and resource type for your application (ECS, EKS, Lambda, and Kubernetes compatible). As we’re deploying a Kubernetes application, we are going to select AWS EKS as seen below.
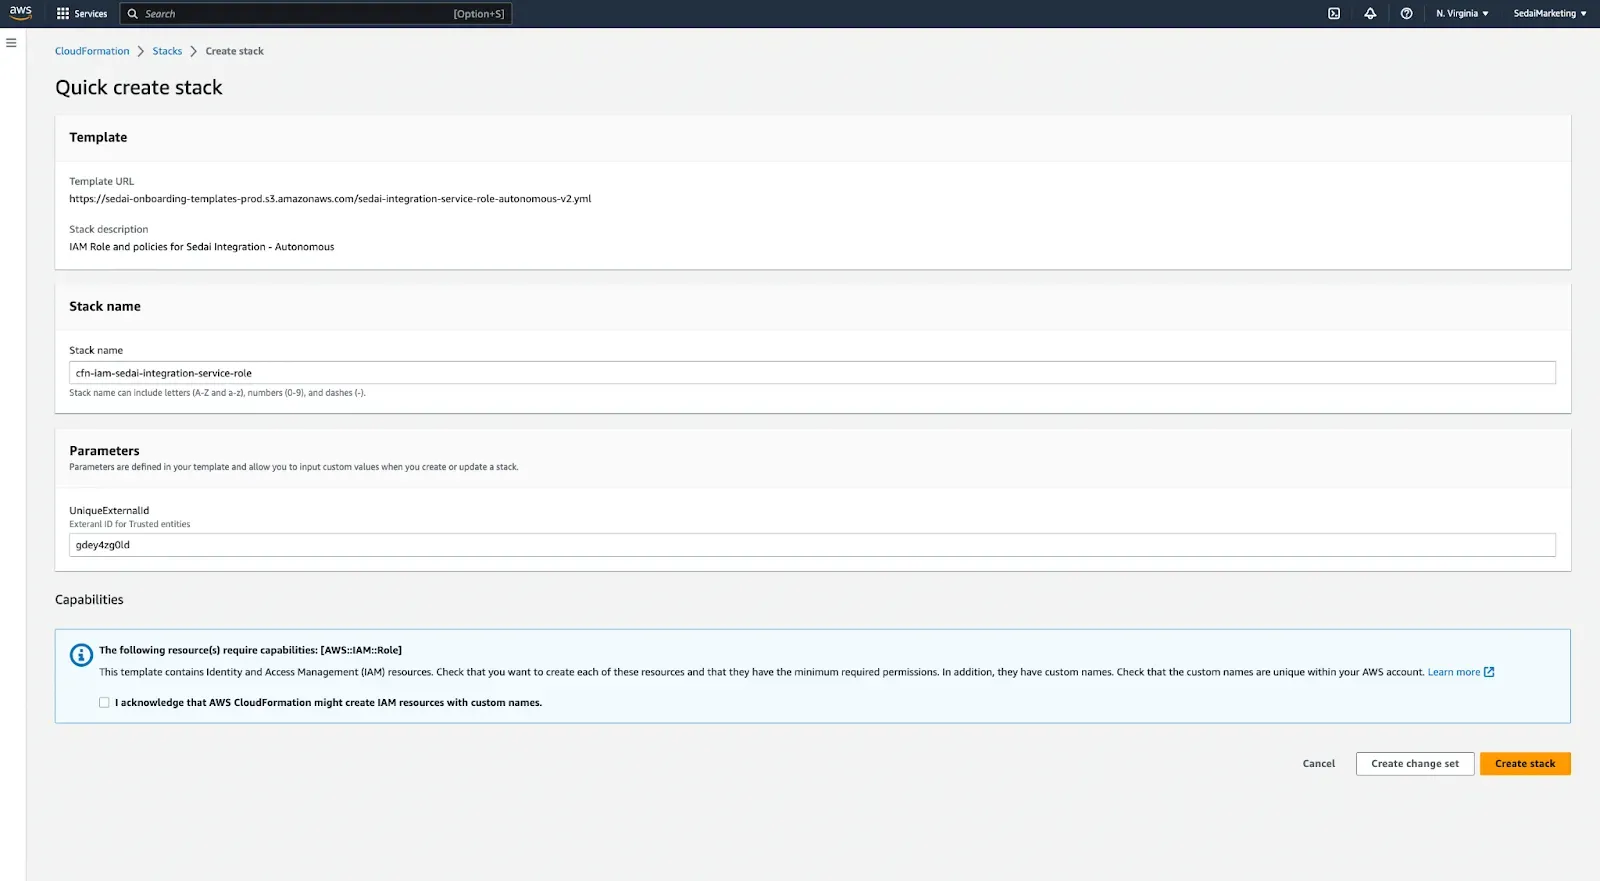
The next step involves connecting to your cloud account through the AWS Identity and Access Management pins on your account. If you are slightly unfamiliar with this, simply click the “Launch CloudFormation” button to create a stack in your AWS account, which will prompt you to create a stack – press create.
After that, simply go to your stack and copy and paste the ARN in the outputs tab.
Once this is done, you will receive instructions to connect a Sedai agent to your AWS account either through the helm or kubetcl command. Simply copy and paste your command of choice to your terminal or Cloud9 IDE.
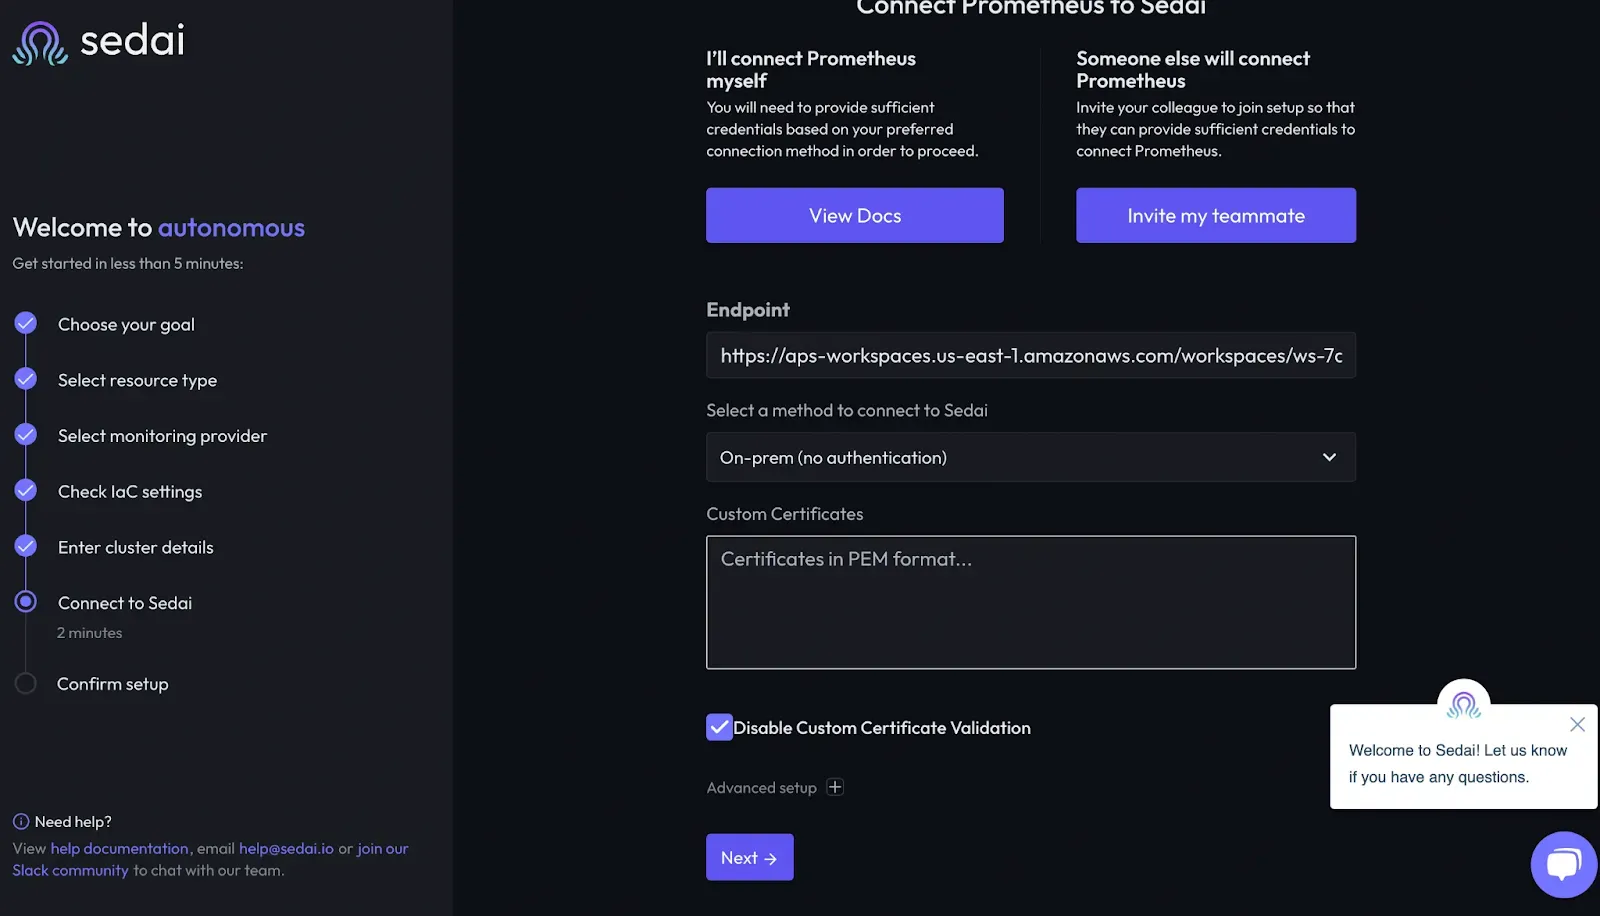
Once this is done, you will be prompted to select a monitoring platform. For the sake of ease, we will be selecting the Prometheus monitoring platform, which is easy to integrate with AWS. We will cover the steps to integrate Prometheus below.
Integrating Prometheus
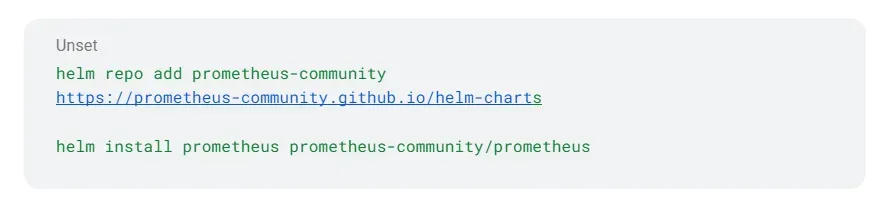
When using the Elastic Kubernetes Service with Sedai, one needs to integrate a monitoring platform into your AWS account. There are many options that Sedai supports, but for the sake of ease, we will install Prometheus. The first step is to download Prometheus locally from the website. Once this is done, you should follow the steps from the blog post linked here.
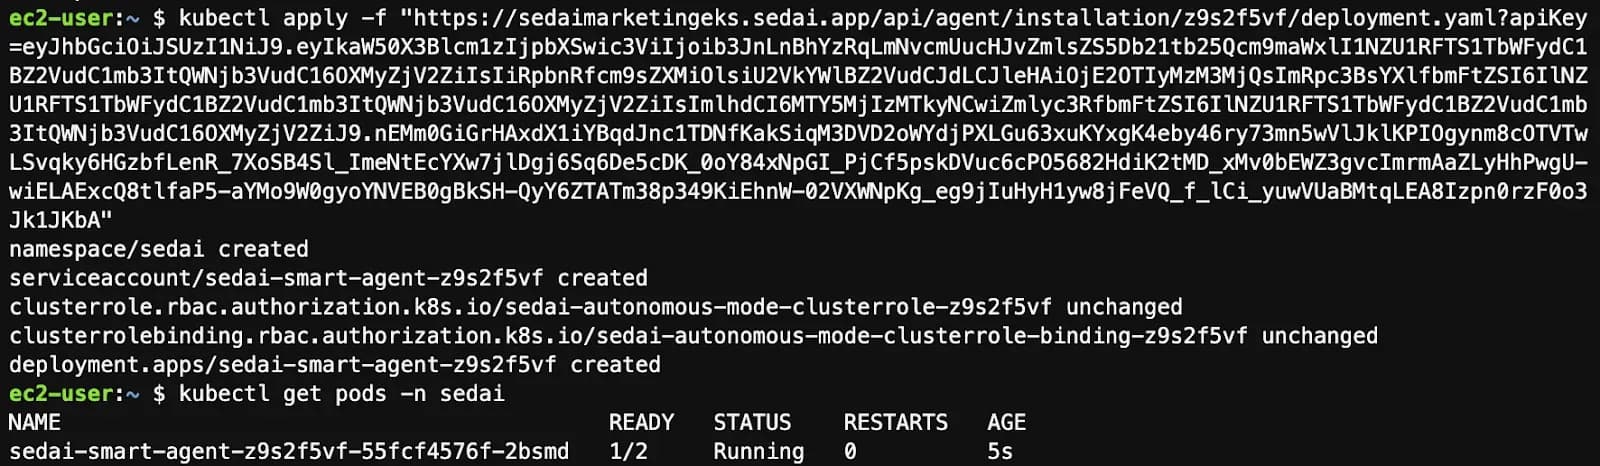
After Prometheus is connected (check progress through kubectl get pods command) and the server is running, connect your local endpoint to Sedai.
The final step is connecting the Sedai smart-agent through the helm or kubectl command the interface provides and wait for the pods to be ready.
Congratulations – once you complete this step, you are ready to launch Sedai! Once you launch the UI, you will be prompted to a homepage with a directory bar on the left to specify the different tools and modes you can access, while the main page will simply display your activity on the application.
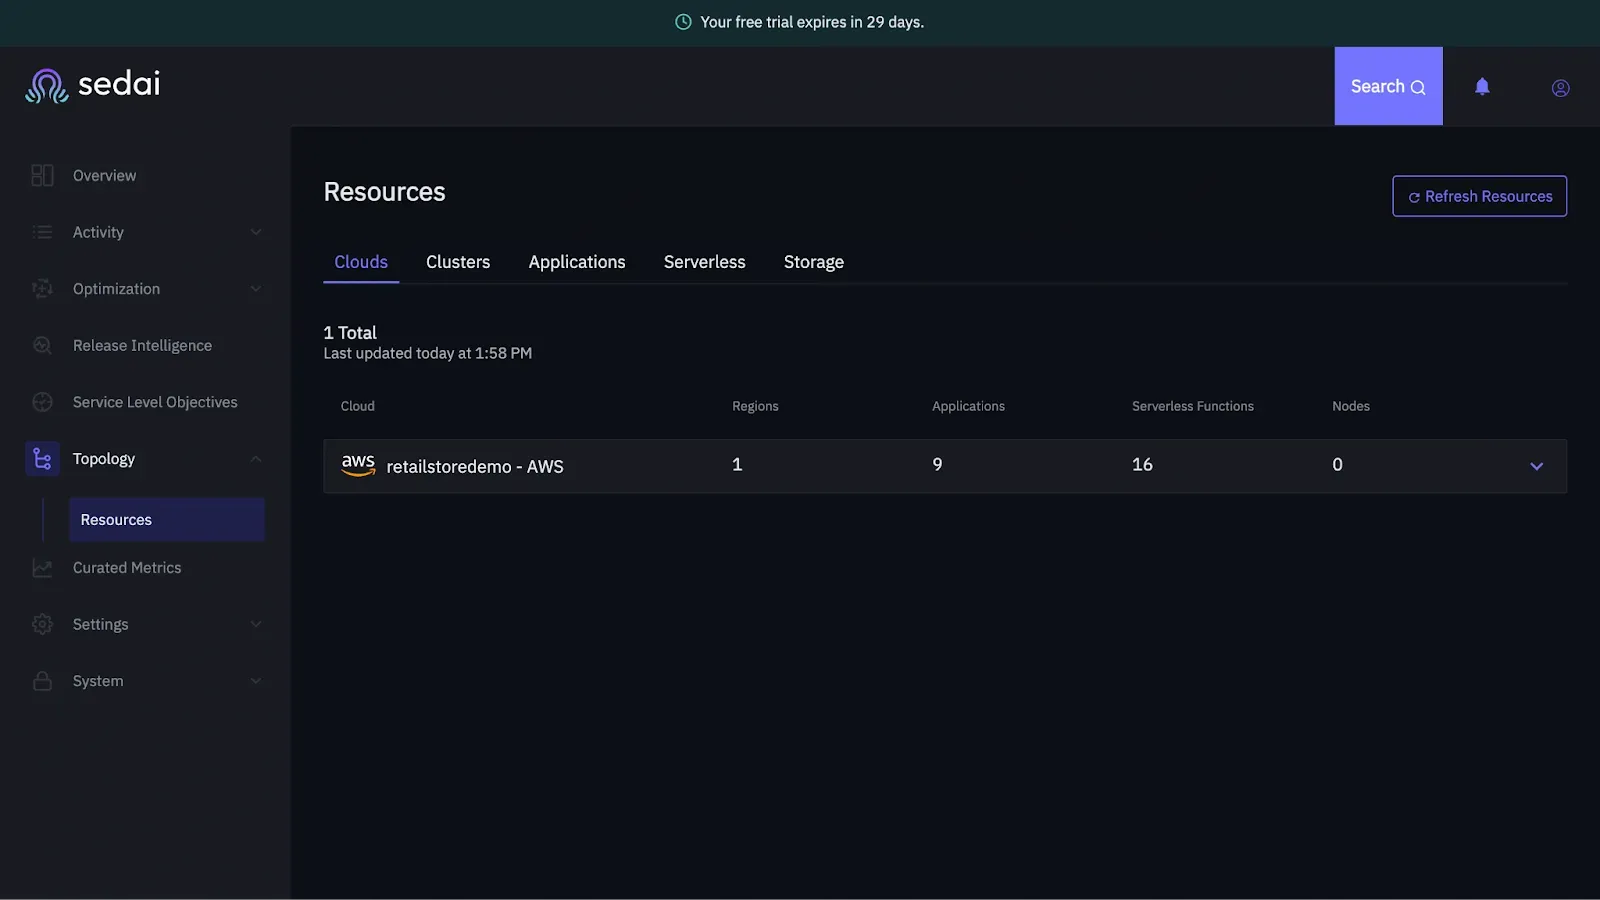
Once you are ready to begin your optimization process, click on the Topology tab and specify the cloud name.
Simulating Traffic
To effectively simulate the software for a variety of different-sized e-commerce stores, we simulated four different loads of traffic/engagement for the e-commerce site: new startup (low), growth company (medium), established (high), and market leader (very high). This was done through the Locust framework, where each traffic bot engaged with the website’s product and payment functionality. The GitHub repository for the traffic simulation is linked here.
Optimizing with Sedai
When you have selected your desired cloud, cluster, application, etc., you can see the optimization/availability actions. Once you are ready to optimize your resource, first look at the optimization opportunities to see the projected impacts of optimization.
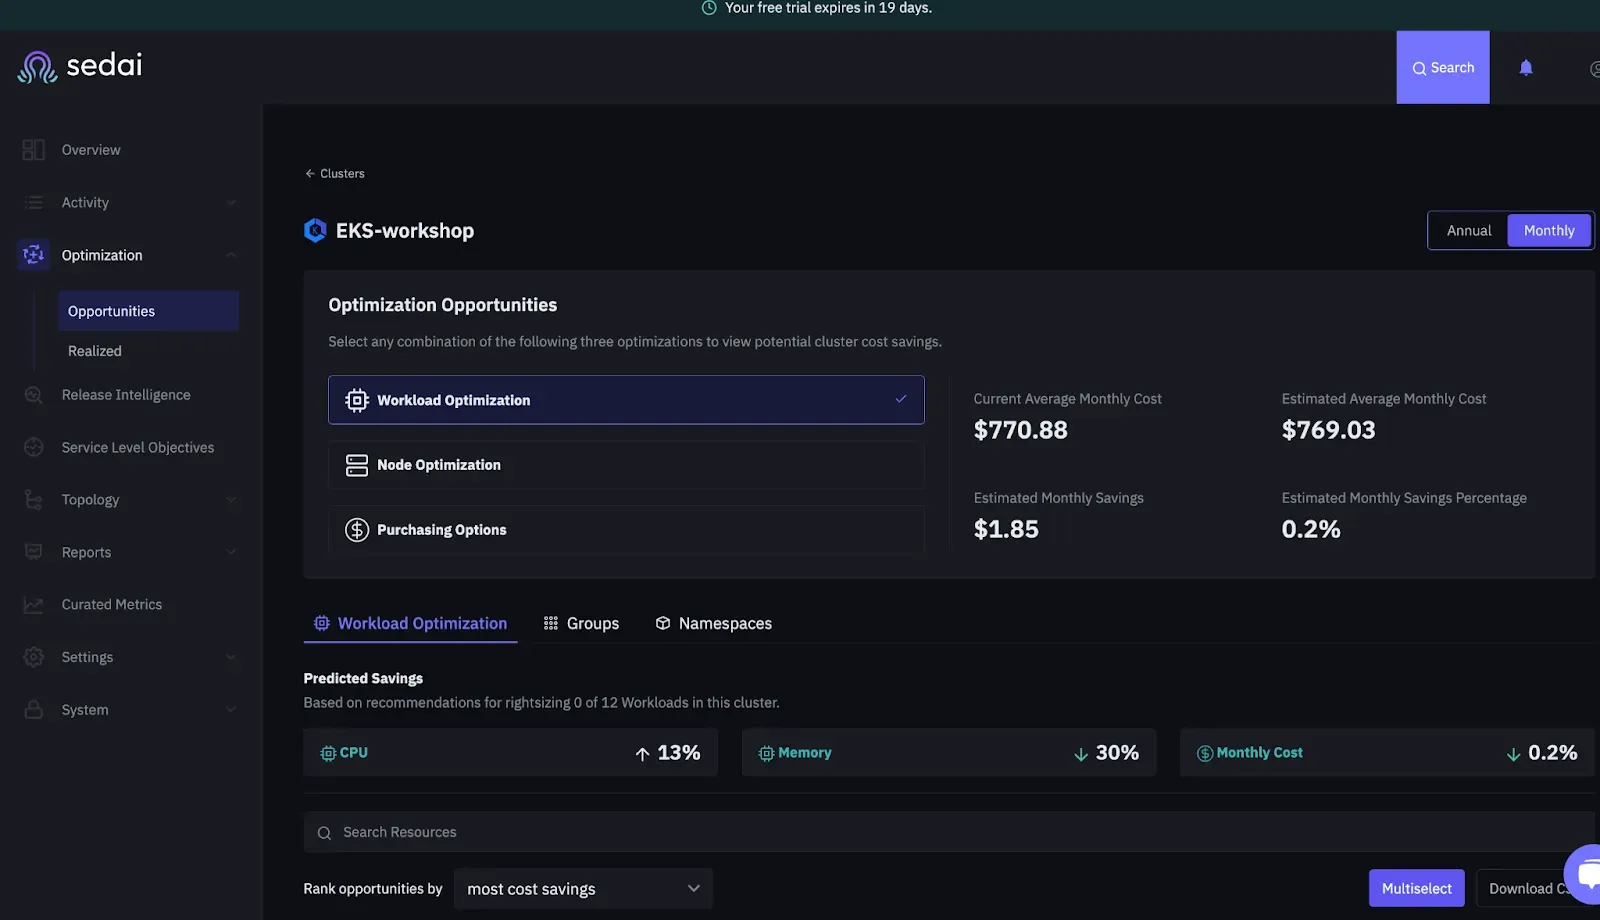
Then, you can specify your optimizations and availability if you go to the settings and topology page as seen below:
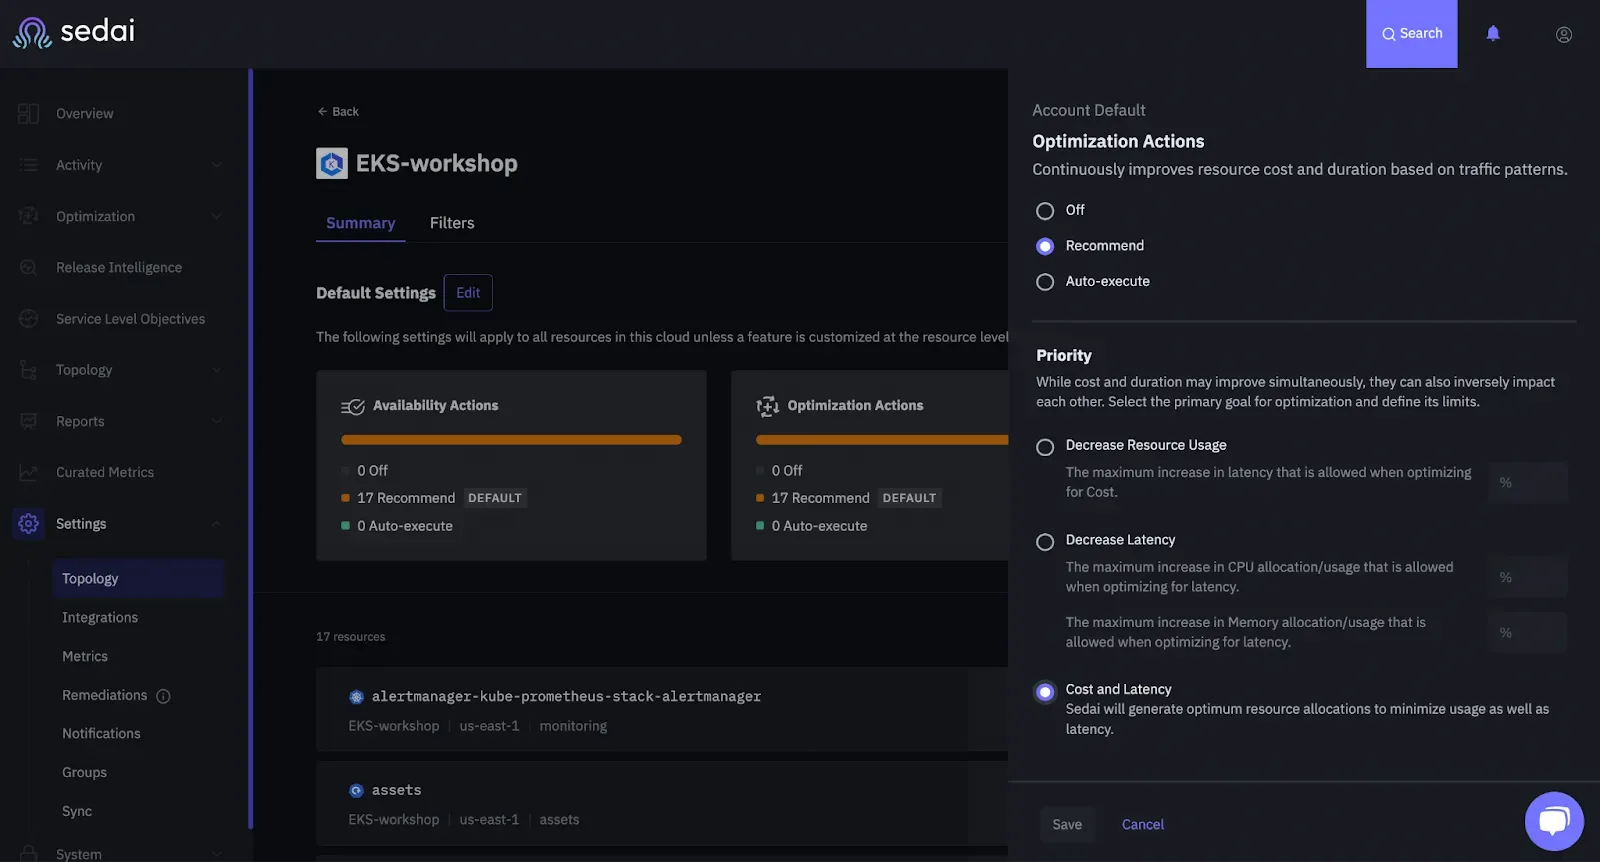
After specifying your optimizations, you should be all set! Sedai does have a two-week learning period based on the data it ingests; however, there will be initial optimizations, where you can begin to see differences
Reviewing Results
We ran Sedai for cost and latency optimization for a two week period and saw significant results that will be described below. The EKS Demo Store underwent 4 different traffic levels -- low, relatively low, medium-high, and high. For the sake of brevity, we will focus on the relatively low, medium-high, and extremely high traffic levels as we review the results.
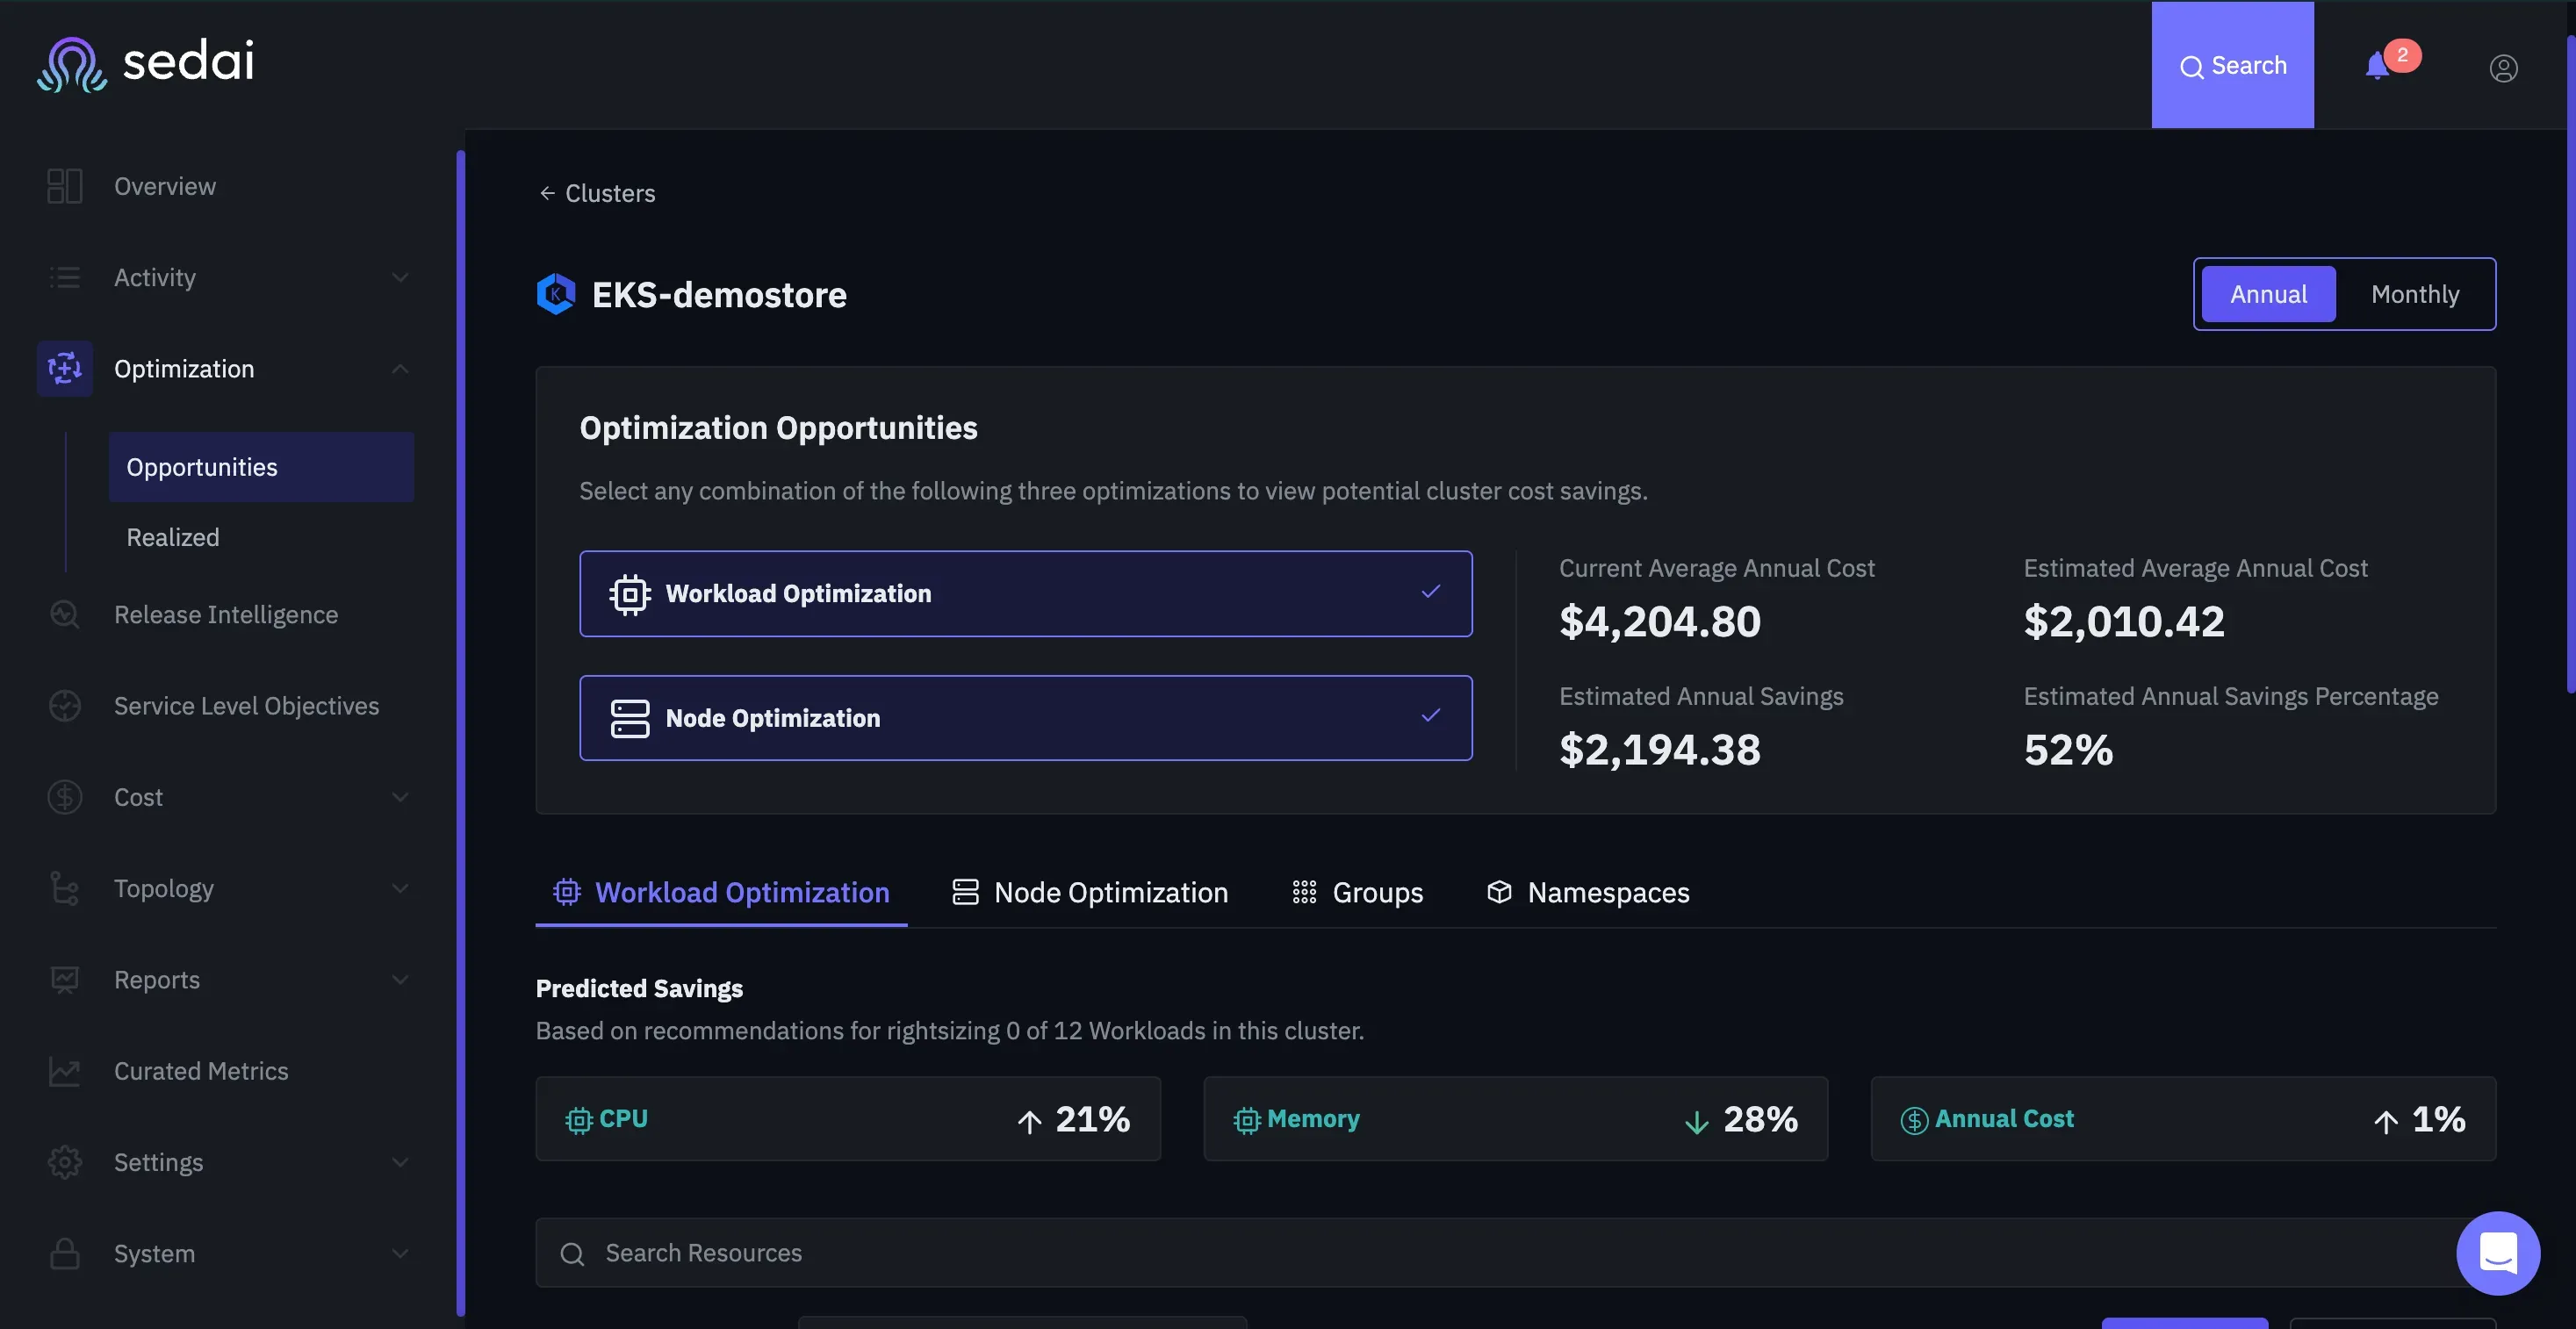
The most significantly affected metric throughout all of the traffic levels was cost. Sedai's optimization tools managed to optimize cost and reduce it by 52% -- a profound change to the cost configurations. The autonomous software did this by increasing CPU utilization by 21% and decreasing memory use by 28%. This combination, in addition to the node group configuration, which was optimized at its current level of 1, led to a significant cost decrease in overall traffic levels as we can see below.
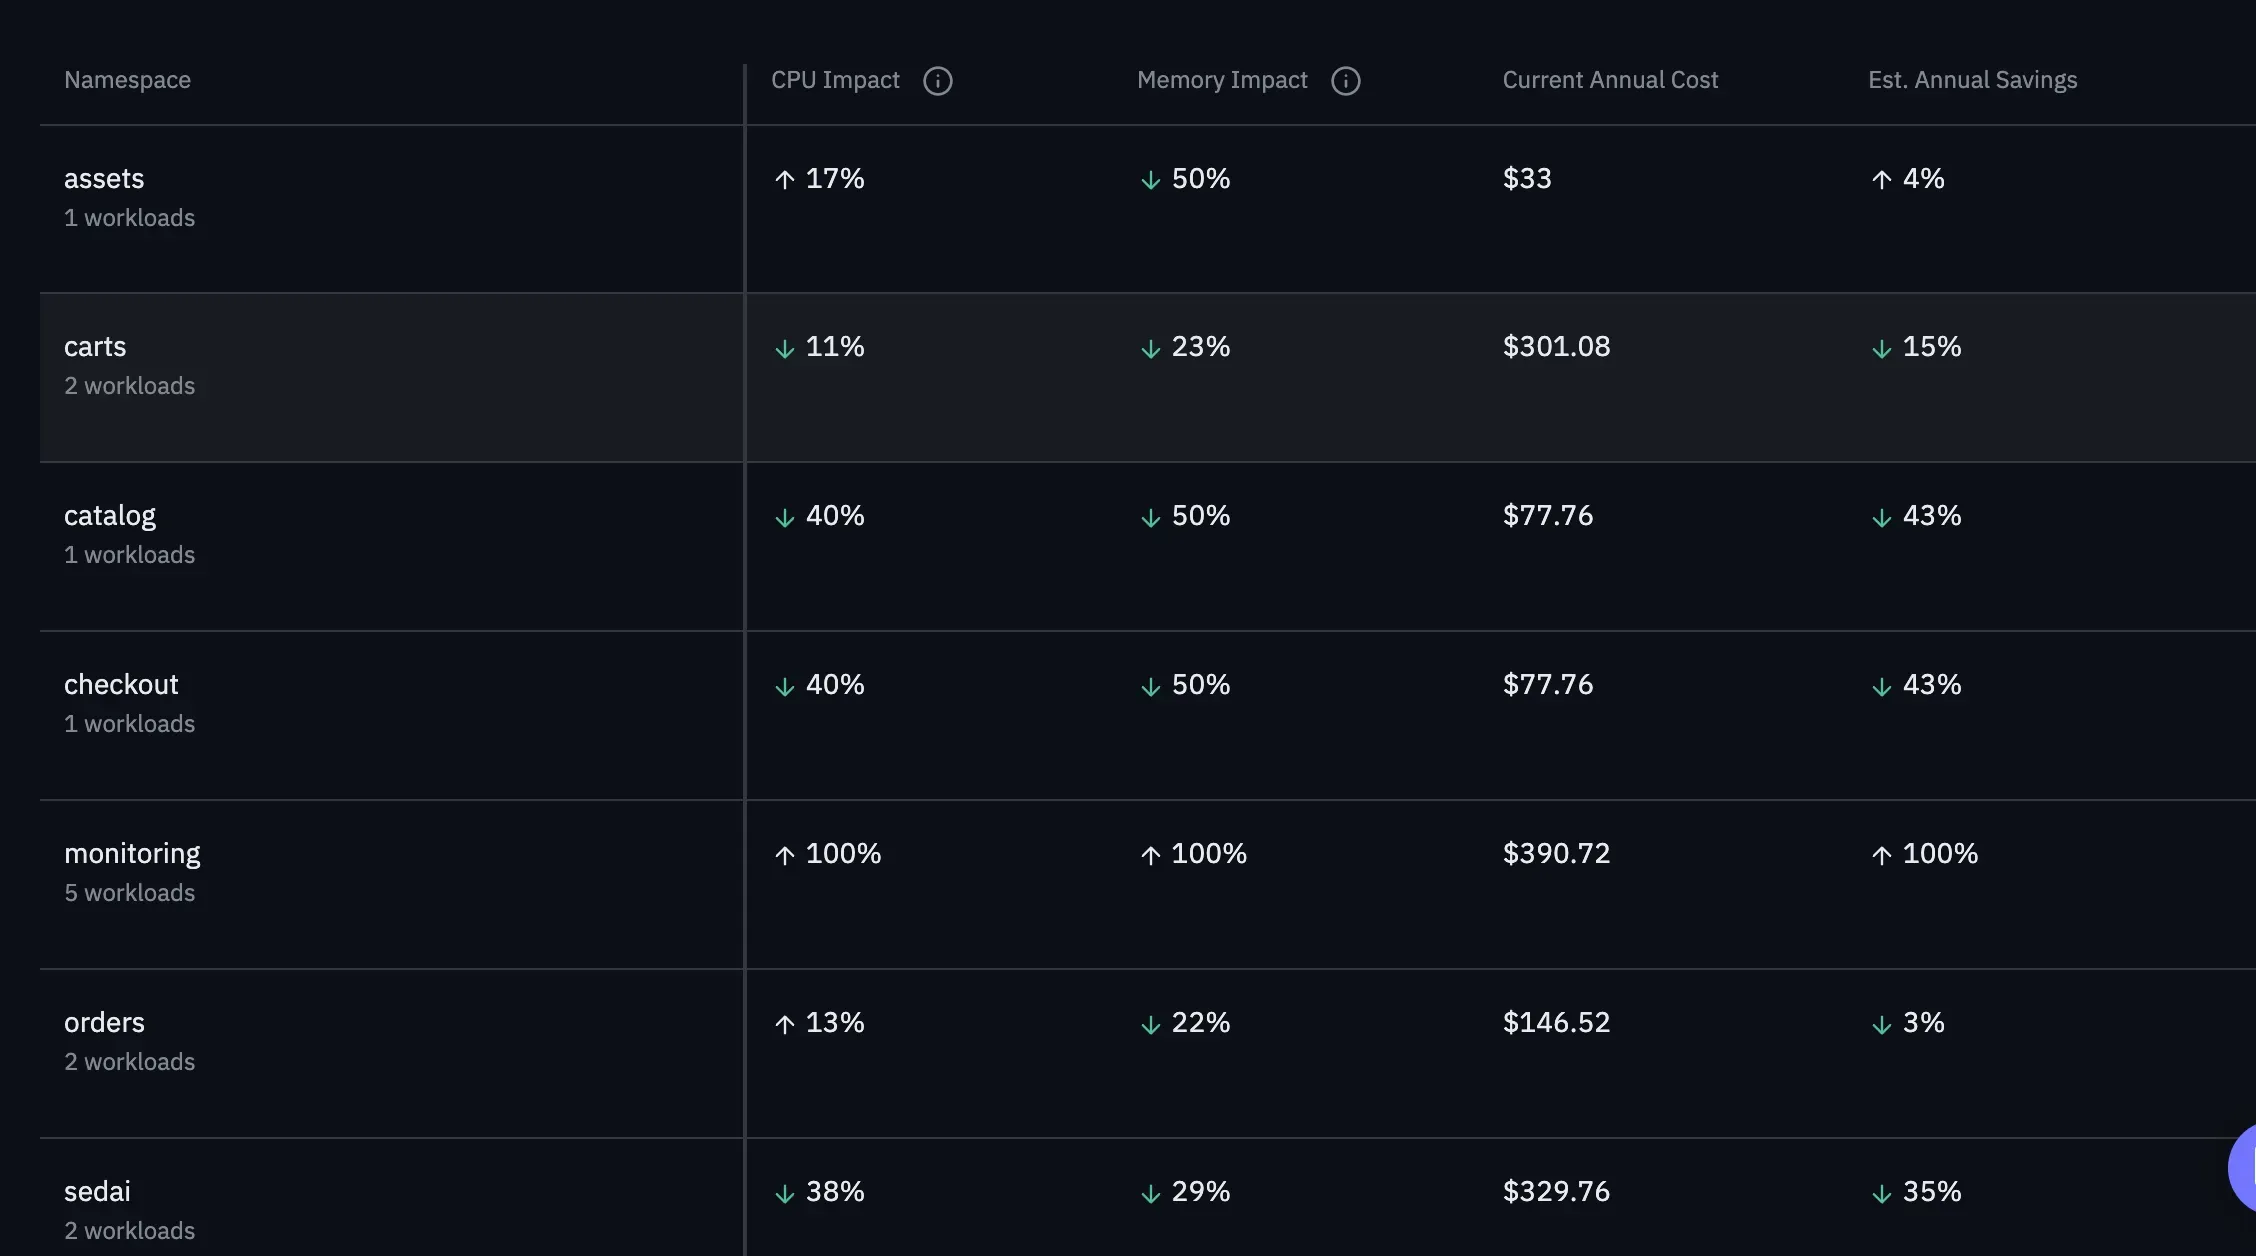
Furthermore, we can see evidence of this CPU and Memory optimization (in turn affecting cost) below. Specifically, we can see the different components of the app decreasing or increasing in CPU and Memory. In turn, we can see the effect on savings as seen on the far right.
Now, as we move on to latency, we can observe the difference in latency between the different traffic levels:
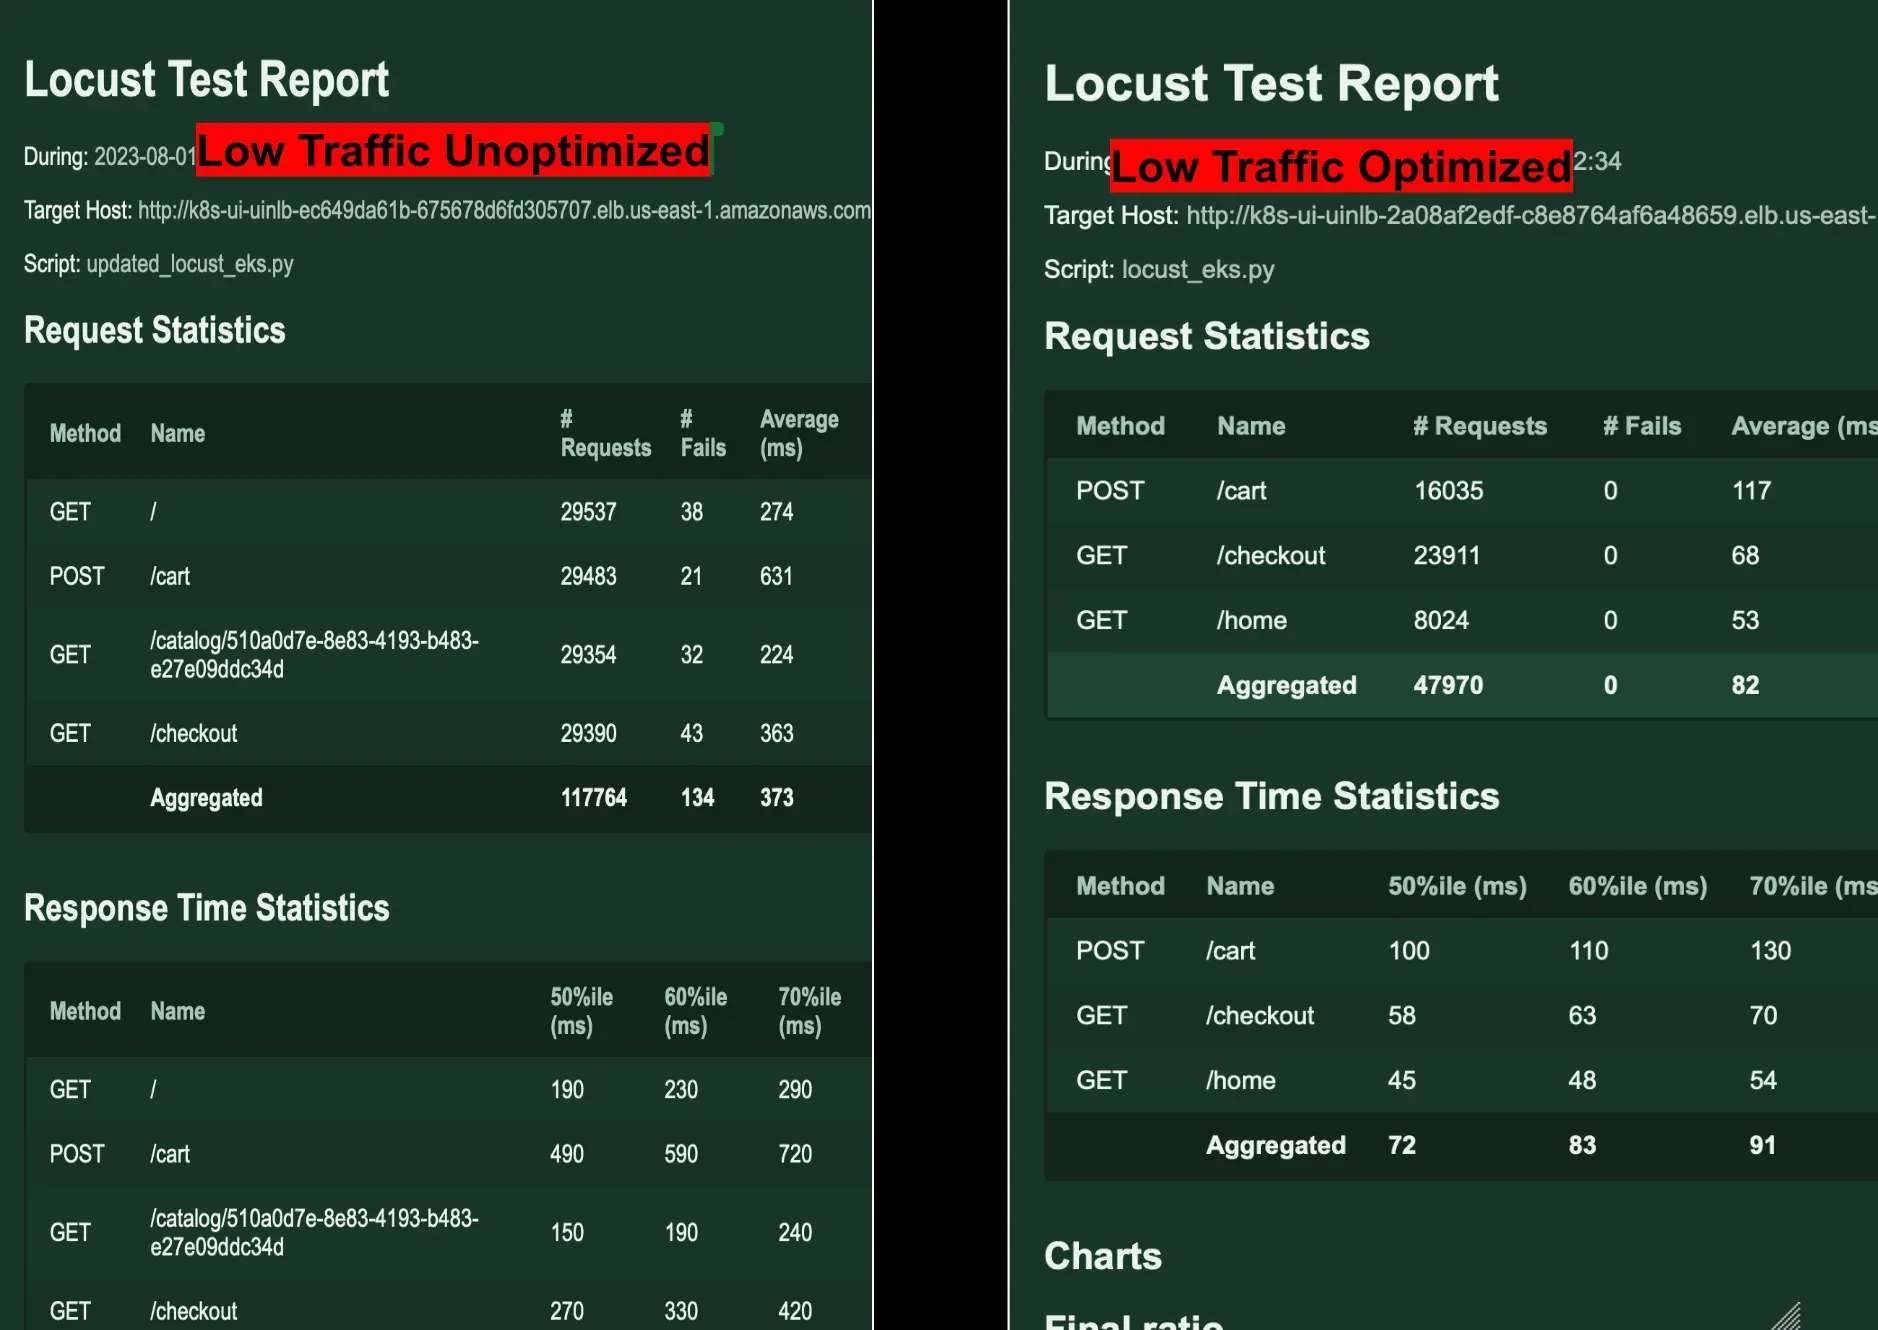
In the context of low traffic conditions, the comparison between optimized and unoptimized software performance reveals significant disparities. Despite the modest user count, the unoptimized state exhibited a notably higher failure rate, suggesting inefficiencies in handling even minor traffic fluctuations. Moreover, the optimization process yielded a substantial improvement in response time, reducing it from 373 ms to a swift 82 ms. This stark contrast underscores the critical importance of software optimization, even when dealing with limited traffic, to ensure reliability and enhance user experience.
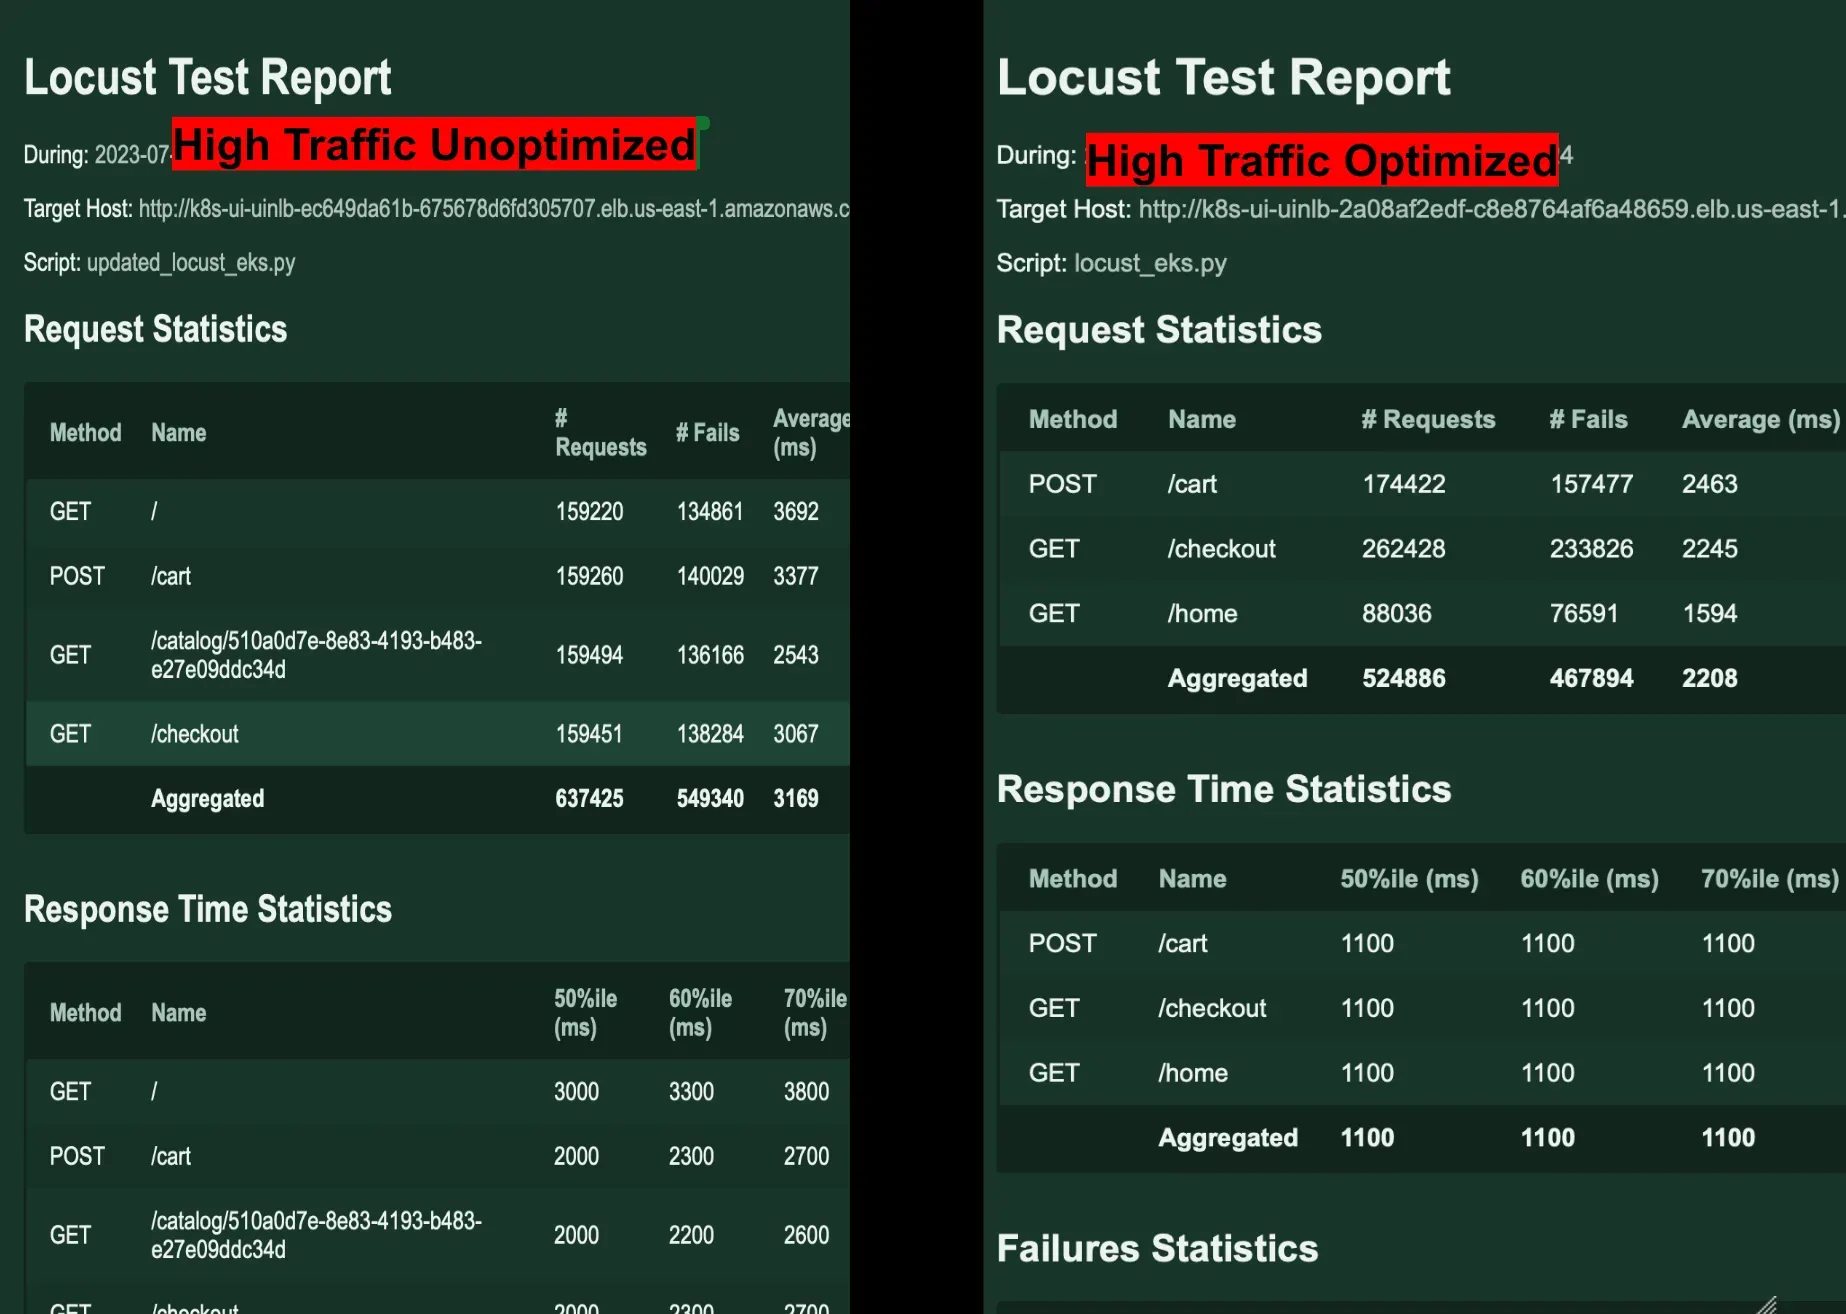
Under high-traffic scenarios, the comparison between optimized and unoptimized software performance yielded interesting insights. While the optimization didn't significantly reduce the number of failures, suggesting the system's inherent robustness, it did lead to a notable enhancement in response times. Specifically, the response time was trimmed down from a lagging 3169 ms to a more efficient 2208 ms post-optimization. This improvement emphasizes the value of optimization in ensuring timely responses, crucial for maintaining user satisfaction and engagement during peak traffic periods.
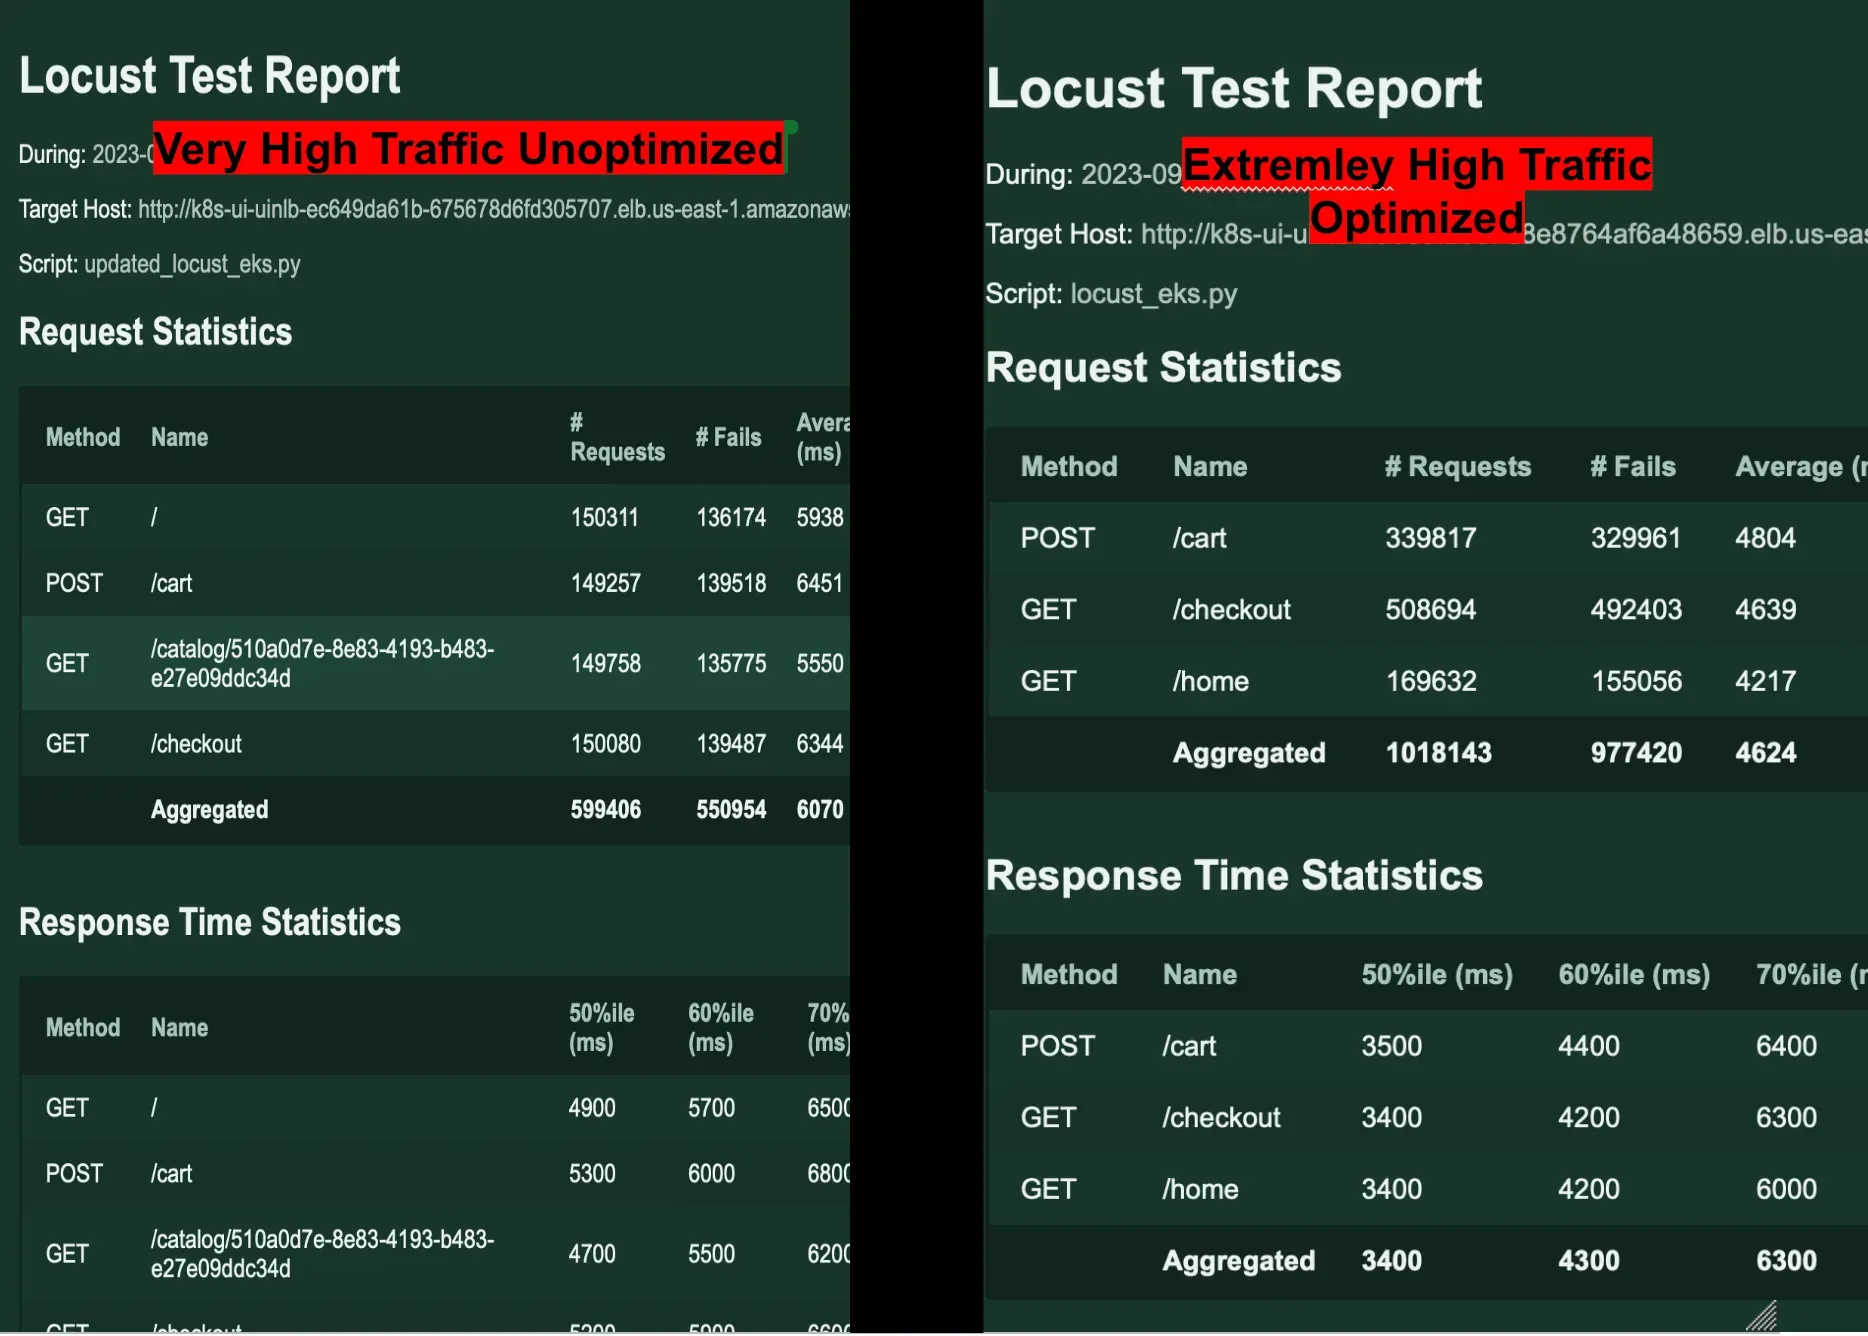
In situations of very high traffic, the software's performance metrics presented some remarkable outcomes. Despite facing a significantly increased number of requests, optimization efforts proved their worth by achieving a marked reduction in latency. The response time was effectively brought down from a prolonged 6070 ms to a more manageable 4624 ms, translating to a decrease of over 25%. This substantial improvement, even under intense traffic loads, underscores the pivotal role of optimization in enhancing system responsiveness and ensuring a smoother user experience.
Conclusion
The performance and reliability of EKS deployments can be significantly influenced by specific configurations and deployment strategies. Minor optimizations in EKS configurations can lead to substantial improvements in cluster response times and resilience. For instance, a study by Google showed that a 1% reduction in page load time can result in a 2% increase in conversions. Amazon discovered that a 100ms decrease in response time can elevate customer satisfaction by 1%. Additionally, Microsoft's research indicates that a 10% reduction in latency can boost productivity by 5%.
Sedai, with its advanced optimization capabilities, has been especially successful in enhancing the performance of EKS deployments. By optimizing pod scaling, resource allocation, and network configurations within EKS, Sedai ensures faster application response times and minimizes cost significantly. This not only improves user experience for applications hosted on EKS but also drives customer satisfaction and potentially higher revenue. With streamlined server-side processes within the Kubernetes cluster, applications become more responsive, ensuring efficient access to required resources. The true value of Sedai lies in its potential to offer a robust and seamless experience on EKS deployments, fostering increased trust and loyalty among end-users. Adopting Sedai is imperative for businesses that aspire to lead in the dynamic world of cloud-native applications and EKS deployments.
